
Quickly User Manual
Applicable version: Luwu-OS v2.1.2Supported models: XGO Mini / XGO Lite / XGO Mini2 SW / XGO Mini3 W / XGO Rider
🚀Quick Start Card (30 Minutes)
This card helps you experience the core features of Luwu-OS in the shortest possible time.No computer is needed — everything is done with the 4 physical buttons on the robot itself.
Button Reference
Before you start, get to know the 4 physical buttons on the robot:
Button | Position | Function |
A | Top left | Previous / Move left / Decrease |
B | Top right | Next / Move right / Increase |
C | Bottom left | Exit / Back to previous level |
D | Bottom right | Confirm / Enter |
Step 1: Power On
Place the robot in aprone position(belly down, legs naturally folded) on a flat surface
Short-press the power button on its back; the ring LED starts flashing rapidly
The robot performs initialization automatically: the body slowly stands up → the robotic arm runs a self-check (models with an arm only)
The LED turns solid and the screen lights up with the Luwu-OS boot screen
You arrive at thehome screen— 5 feature cards arranged in a horizontal carousel
⚠️Do NOT hold or shakethe robot while it is powering on, otherwise the sensor calibration will be affected. We recommend connecting to WiFi right after the first boot.
Step 2: Connect to WiFi
Method 1: QR Code Configuration (Recommended)
On the home screen, switch to the 1st card "Wireless Network" and pressDto enter
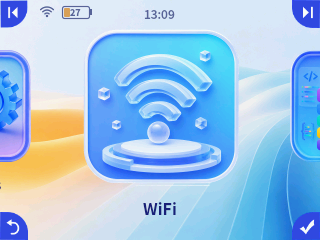
The screen shows the WiFi configuration QR code; scan it with your phone
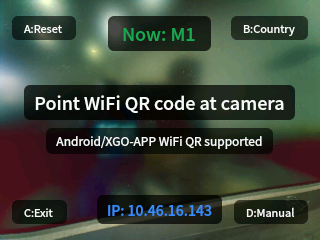
On your phone, open a WiFi sharing QR code (Android can generate one in the system WiFi settings) and point it at the robot's camera
Once recognized, the robot connects to the WiFi automatically
The WiFi icon in the status bar at the top of the screen turns solid — connection successful
Method 2: Manual Network Selection
If you cannot generate a QR code, you can also select a WiFi network manually and type the password:
On the "Wireless Network" card view, pressDto enter manual mode
The robot scans nearby WiFi networks and lists the available ones
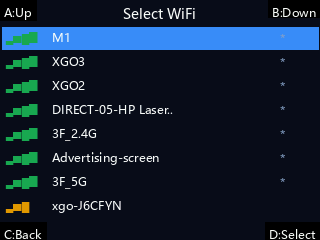
PressA (up) / B (down)to move through the list, pressDto confirm your selection
A virtual keyboard appears; useA/Bto move the cursor left/right andDto select a character to type the WiFi password
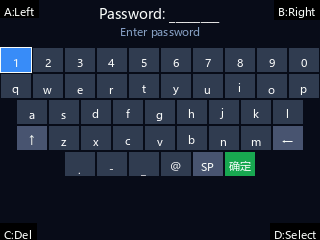
Highlight "OK" and pressD; the robot starts connecting
When connected, the WiFi icon in the status bar turns solid
💡A 2.4GHz WiFi band is recommended; 5GHz may have compatibility issues. If the configuration page fails to load, make sure your phone has mobile data on or is connected to another working WiFi.
Step 3: Explore the 5 Feature Cards
PressA (left)andB (right)to switch between cards on the home screen, and pressDto enter:
Card | Function |
🌐WIFI | WiFi configuration / phone hotspot |
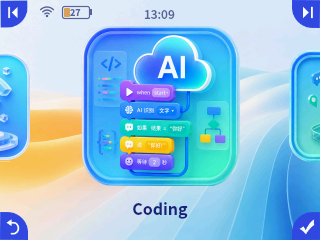
🧩Coding | Blockly visual programming |
🤖AI Chat | Voice dialogue (wake word "Xiao Lu Tong Xue" / 小陆同学) |
🎮Demos | Collection of feature demos |
⚙️Settings | System settings (volume / language / updates, etc.) |
Step 4: Try a Feature
Enter the 4th card "Demos", then pick any of the following:
Performance Mode: the robot loops through actions automatically + plays music + shows facial animations on screen
Face Tracking: detects a face and makes the robot follow it
Gesture Recognition: make gestures at the camera and the robot responds with matching actions
Ball Grasping: recognizes red/green/blue balls and automatically tracks and grabs them
VMT (Video Streaming Mode): control the robot remotely from a browser with a live camera view
Inside any feature, pressCto exit back to the main menu.
🎉Congratulations! You have now mastered the basics of Luwu-OS.