
1.1 Getting to Know the Buttons
Facing the robot, there are two physical buttons on each side of the screen:

Button | Position | Function |
|---|---|---|
A | Top left | Previous / Move left / Decrease |
B | Top right | Next / Move right / Increase |
C | Bottom left | Exit / Back to previous level |
D | Bottom right | Confirm / Enter |
1.2 Powering On
⚠️ During power-on, the robot calibrates its built-in sensors (the Inertial Measurement Unit, IMU). Holding or shaking the robot while it boots will corrupt the calibration data and may cause abnormal motor jitter or uncontrolled movements. Always place the robot on a flat, stable surface before powering on.
Power-on steps:
Quadruped robots (XGO-Mini / XGO-Lite / XGO-Mini3W, etc.)
Positioning: place the robot in a prone position (belly on the ground, legs naturally folded) on a flat surface. Make sure no leg joints are stuck or interfering
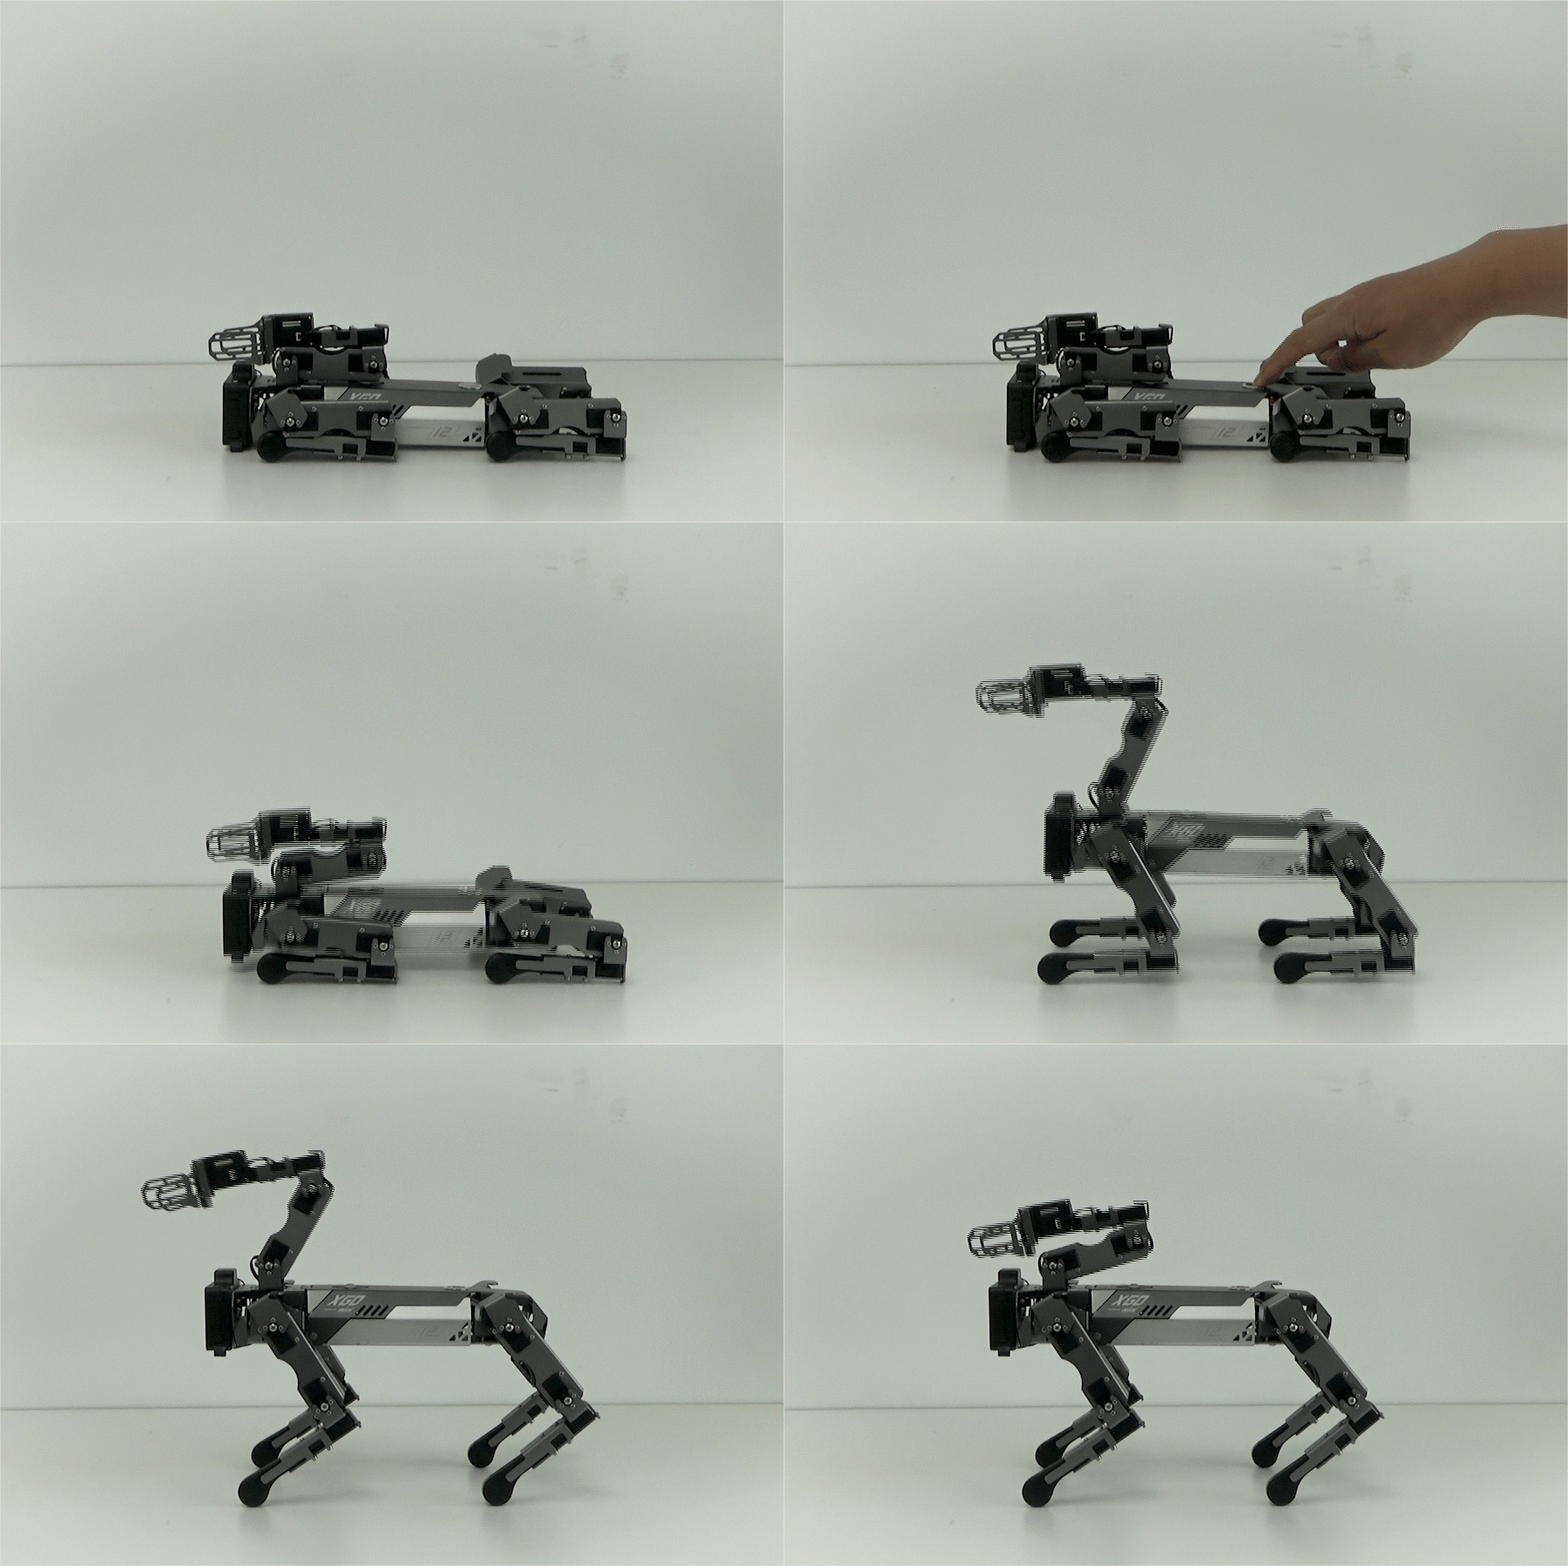
Power up: short-press the power button on the robot's back. The ring LED around the button flashes rapidly, then turns solid, indicating the low-level circuitry is on
Initialization sequence (fully automatic, no action needed):
The body slowly rises to the default standing height
The robotic arm extends and retracts to verify the joint servos (models with an arm only)
Initialization is complete when the arm is fully retracted and the body stands still
System boot: the screen lights up and shows the Luwu-OS boot screen
Desktop: the home screen appears with 5 feature cards arranged horizontally — boot complete
Two-wheeled legged robot (XGO-Rider)
![328bda9730eb707494b1b3fc6d308bbd[00h00m01s-00h00m08s].gif](/uploads/images/2026/08/7ca4c115-0b6e-460a-9bbd-582595a01a45.gif)
Positioning: place the robot in a reclined position on a flat surface. The Rider springs up and self-balances after power-on, so do NOT place it near the edge of a table or anywhere high up to avoid a damaging fall
Power up: turn on the power switch; the power indicator lights up
Initialization sequence (fully automatic, no action needed):
The Rider springs up from the reclined position into an upright standing posture
To keep its balance, the Rider rocks back and forth slightly — this is normal, not a malfunction
Initialization is complete once the balance is stable
System boot: the screen lights up and shows the Luwu-OS boot screen
Wheeled-legged robots (XGO-Ranger, etc.)
Positioning: place the wheeled-legged robot steadily on a flat surface
Power up: turn on the power switch; the power indicator lights up
Initialization sequence (fully automatic, no action needed):
The body automatically adjusts to the default posture
The body stays still once initialization is complete
System boot: the screen lights up and shows the Luwu-OS boot screen
Desktop: the Gallery home screen appears after about 30 seconds — boot complete
⚠️ Do not cut the power or force a shutdown while the initialization sequence is running. If anything goes wrong during initialization (e.g. the robot never manages to stand up), long-press the power button to force a shutdown, then power on again.
1.3 Charging
Connect the supplied power adapter to the robot's charging port
Watch the LED indicator on the power adapter:
Indicator | Meaning |
|---|---|
🔴 Solid red | Charging |
🟢 Solid green | Fully charged — please unplug |
A full charge cycle takes about 1.5 to 2 hours (depending on the remaining charge)
When the battery is extremely low, it may take 1–2 minutes after plugging in before the indicator turns red
Unplug the charger promptly once charging is complete to avoid prolonged overcharging
⚠️ Never charge for more than 12 hours. Ensure good ventilation while charging.
Long-term Battery Maintenance
Lithium-polymer (Li-Po) batteries are extremely sensitive to voltage. Improper storage can cause swelling or irreversible capacity loss.
1. Over-discharge Protection
Low-battery alarm: when the robot raises a low-battery alarm or its movements become "weak", stop using it and charge it immediately.
Never store fully drained: do not leave the battery sitting for long periods after draining it completely — the voltage will drop too low, lock the protection board, and ruin the battery.
2. Storage Mode
If you plan to leave the robot unused for more than 4 weeks:
Periodic top-up: run a charge/discharge cycle every 2–3 months to keep the lithium ions active.
1.4 Home Screen Navigation
Press A (left) and B (right) to switch between cards on the home screen, and press D to enter:
Card | Function |
|---|---|
🌐 Wireless Network | WiFi configuration / phone hotspot |
Coding | Blockly visual programming |
🤖 AI Interaction | Voice dialogue (wake word "Xiao Lu Tong Xue" / 小陆同学) |
🎮 Demos | Collection of feature demos |
⚙️ System Settings | System settings (volume / language / updates, etc.) |
The status bar at the top of the screen shows the current time in the center, with the WiFi signal strength and battery level on the right.
1.5 System Settings
Enter the "⚙️ Settings" card to find 9 setting items. Press A/B to move the highlight up/down, D to enter, and C to go back.
No. | Setting | Description |
|---|---|---|
1 | About | View system version, firmware version, CPU info and disk usage |
2 | Check for Updates | Check for new versions online, with one-tap upgrade |
3 | Serial Number | View the device serial number and barcode |
4 | Volume | Adjust system volume (0–100%; A/B steps by 5%, D to save) |
5 | Language | Switch between Chinese / English (auto-reboots to take effect) |
6 | Contact Us | Shows the customer service WeChat QR code |
7 | App Download | Shows the QR code for downloading the mobile App (XGO) |
8 | Time / Time Zone | Set the time zone and sync time automatically from the network |
9 | Reboot | Restart the device after confirmation |